Do you find yourself suddenly needing to record audio or do a PowerPoint voice over? It’s not as difficult as it may seem! I am in no way a tech person— I started a podcast with zero knowledge about audio recording and editing— so I hope my tips and information will ease some of your fears!
Simple Audio Set Up
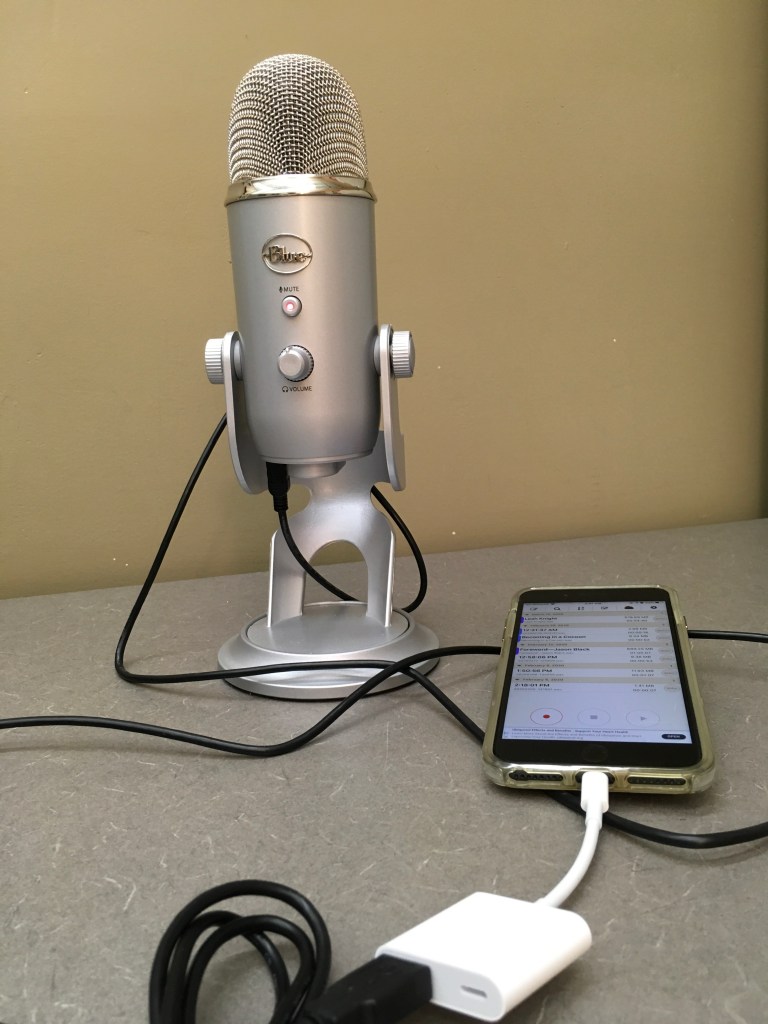
First off, the built-in microphone on your laptop or computer is going to be pretty crappy. If possible, you want to use a USB microphone. Blue Snowball and Blue Yeti (pictured above) are both good choices and popular with podcasters. If you don’t have the budget to buy one, ask around and see if you can borrow one, but if you think you’ll use it a lot it is well worth the investment.
Read through the how-to and experiment a bit before using the mic. There are different pick-up patterns—you’ll want the cardioid setting, which picks up sound from the front of the microphone.
You’ll need a device to record your file. I use Voice Record 7 on my iPhone. It’s simple to use, but there are lots of settings you can change up if you want to get technical. You can save your file to Google, OneDrive, or DropBox, or email it to yourself as an attachment or link to download. I usually record as an MP3 file and email it myself via my phone’s email app.
Another reason I like Voice Record 7 is that the app also includes tools to do some basic editing. You can easily trim your audio or add bookmarks.
If you’re recording on your computer, you can plug the microphone right in, but for a smart phone you need an adapter. The USB mic will draw power from your phone, so it’s good to get an adapter that lets you plug in the phone while you record. For iPhone, this is Apple’s USB camera adapter (about $50). In my experience, I can get about 45 minutes of recording time for about 10% of my phone battery unplugged, but this is going to vary based on your phone and battery life.
Another option is to use what’s called a lav (lavalier) mic, which are available as both corded and wireless versions. These are the clip-on mics that you use when lecturing. They have a regular mic jack, so if you’re using an iPhone you will need the Lightning-to-Headphone adapter. You don’t need to spend a fortune, but be sure to check out the reviews and do a little Googling before you buy.
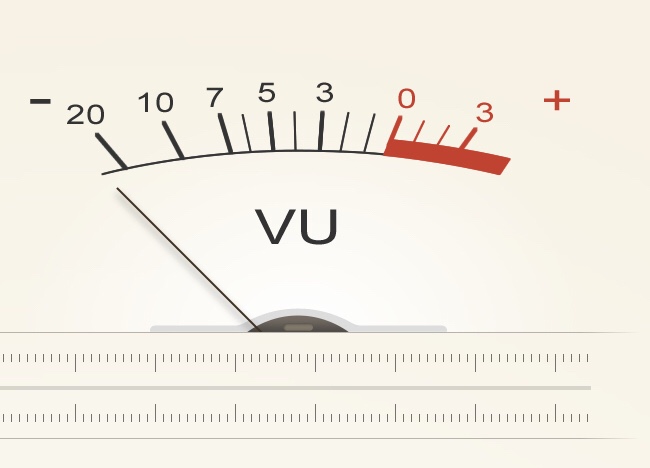
Check your sound quality and do a test recording before you start. The needle on the VU meter should be approaching the red zone, but not in it while you record. If you’re not picking up the sound well enough, experiment with placement of the mic. You can also adjust the gain (essentially the microphone’s sensitivity) on the microphone, if you have a Yeti, or in the recording app.
Finally, listen to your test recording for ambient sound. You may pick up more (or less) ambient sound than you would think. Make sure that the ambient noise isn’t overpowering or distracting. If you’re in a quiet office you should be fine.
If you’re more comfortable with recording tech, you can check out the open source software Audacity. This seems to be the go-to for indy podcasters. The interface isn’t as fancy as you might get with other programs, but there is a huge help community and it’s free.

Before I learned Audacity, I started with GarageBand, which came with my Mac. I found the interface friendly and easy to use, so it was a good way for me to start getting familiar with audio editing (yes, I was starting with zero knowledge!). It’s not the greatest for podcasting, but if you’re looking to record a lecture or conference paper and want a bit of editing ability (but not too much) it very much does the job.
Recording a PowerPoint or Screen
If you’re recording over a PowerPoint presentation, it’s even easier. Use the built-in recording feature with a mic for best results.
If you have a webcam, you can include your face in the recording. Be sure to check the placement of the webcam in relation to your face, especially if you are using one build into your laptop. You probably don’t want to be looking down your nose at your audience the entire time! This can be simply fixed by stacking some books under your laptop until you are more “face on” to the camera.
Record your lecture over top of the slides. You can delete your recording for a particular slide and redo it at any point without having to redo the entire thing. When you’re finished, save it then export your recorded PowerPoint as a movie file. (Your saved PowerPoint file will be quite large!)
For screencasts, I use Screencastify. (You can see an example of one I did here.) It’s a free plug in for Chrome and you sign in with your Google account. When you being recording you have the option of recording your entire computer screen or only an app window. You can have up to four movies saved at any one time; just download and delete to create space for more. Screencastify also offers some basic editing as well.
The challenge with recording a screencast where you type is keyboard noise. I did a bit of research into how to reduce the sound and learned that gamers who live stream buy very expensive keyboards to minimize key clicks. That wasn’t in my budget.
Instead, I put padding under my keyboard to reduce vibrations against the desk and suspended the microphone from my ceiling so it was a bit further away from the keyboard and didn’t pick up vibrations through the stand. It wasn’t perfect, but you do what you can with the tools you have!
I hope this information has been helpful. Feel free to reach out with any questions you have. There are lots of ways to approach recording and a lot of different apps and programs available—this is just what I’ve done.
